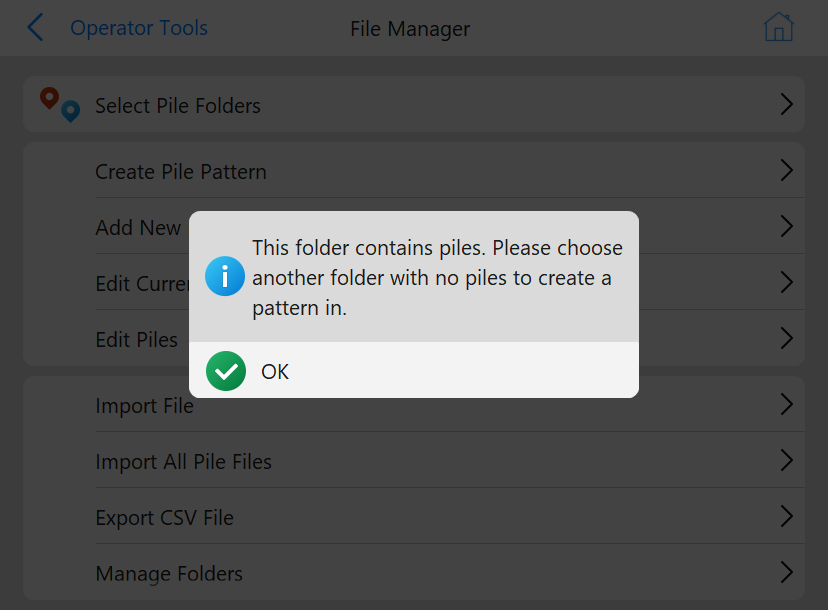
Pile patterns can be created in PD Grade. After pressing the button in Pile File Manager a file explorer will appear asking where the operator wants to store the pile pattern. The operator must either select a folder without a pile pattern, or create a new folder. Otherwise, the following popup will appear.
Occupied Pile Pattern Folder
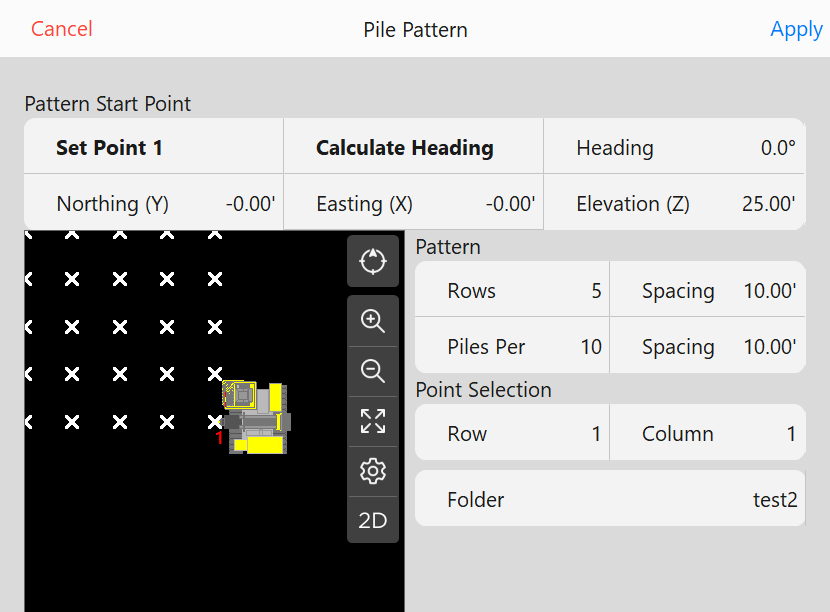
After selecting an empty folder, the following menu will appear:
Create Pile Pattern Menu
Buttons
Pattern Start Point:
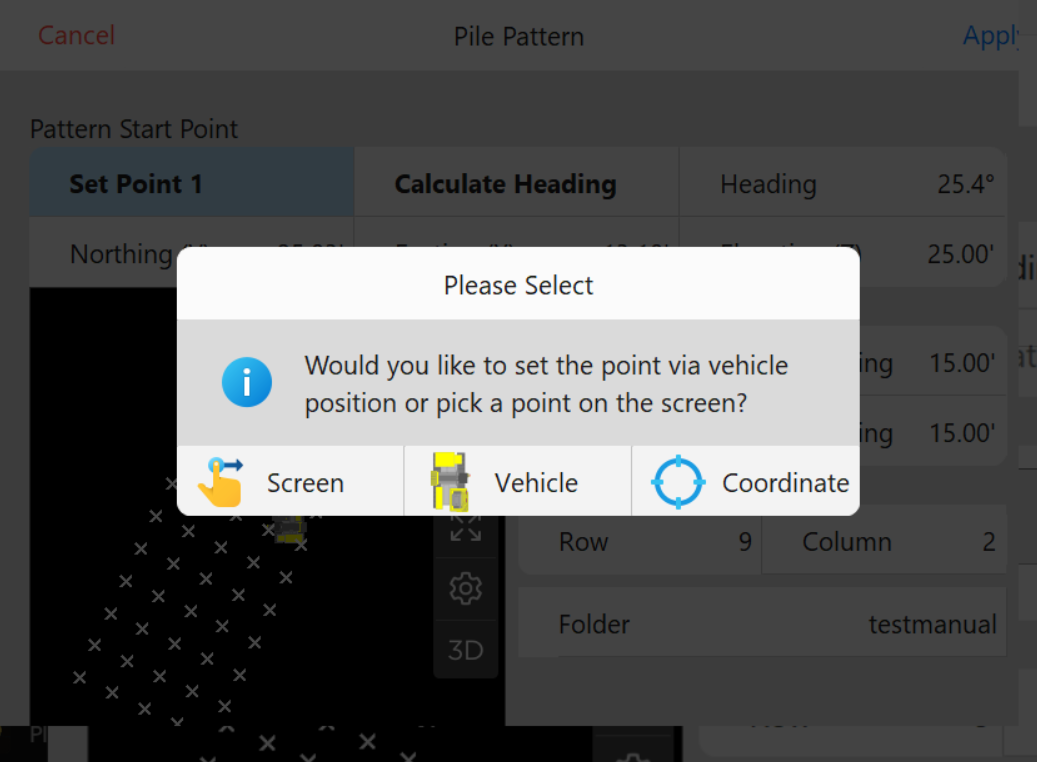
Set Point 1: Allows the operator to set the start point of pattern based on pressing a point in the preview, the current position of the vehicle, or a specified coordinate. A prompt to verify the coordinate will appear after every option:
Select Point 1 Options
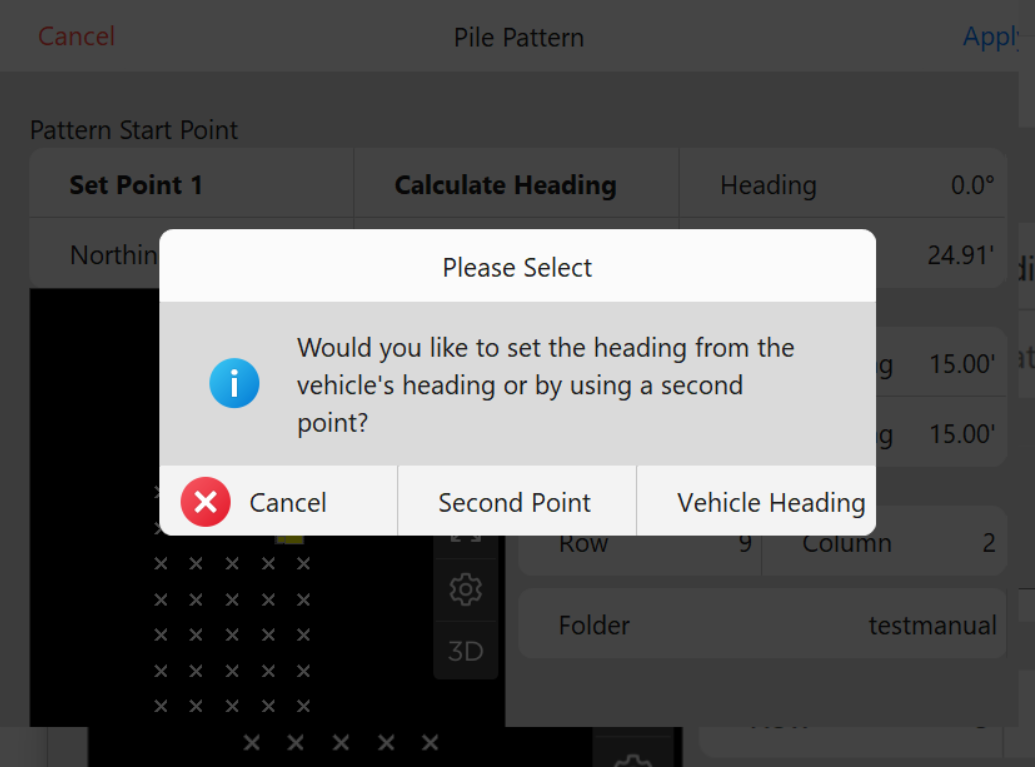
Calculate Heading: Allows the operator to calculate the heading of the pattern based on either entering a second point or by using the vehicle heading:
Calculate Heading Options
Heading: Displays the heading of the pattern or can be clicked to manually enter a heading value.
Northing (Y): Displays the starting Y coordinate of the pattern or can be clicked to manually enter a coordinate.
Easting (X): Displays the starting X coordinate of the pattern or can be clicked to manually enter a coordinate.
Elevation (Z): Displays the starting Z coordinate of the pattern or can be clicked to manually enter a coordinate.
Pattern:
Rows: The number of rows desired in the new pattern.
Spacing: The spacing between each row.
Piles Per: The number of piles desired in each row of the new pattern.
Spacing: The spacing between each column.
Point Selection:
Row: The row being used as the start point.
Column: The column being used as the start point.
Folder: Displays the folder that was selected in the previous step.
After completing the design of the pattern and pressing Apply. The user will be prompted to add the pattern to the current working folders.