The Pile File Manager contains all the functions for manipulating the pile designs.
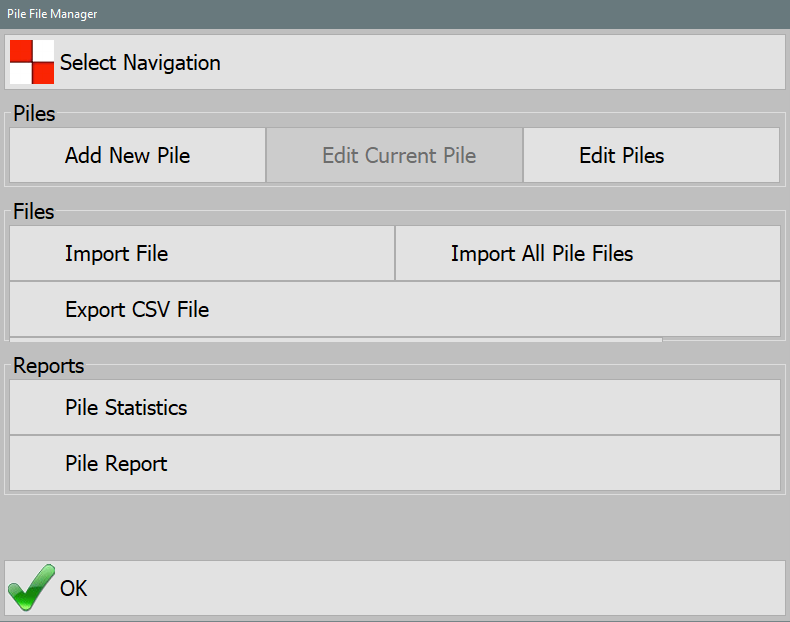
Select Navigation
Choose which piles to load into the main view from the loaded patterns using this menu.
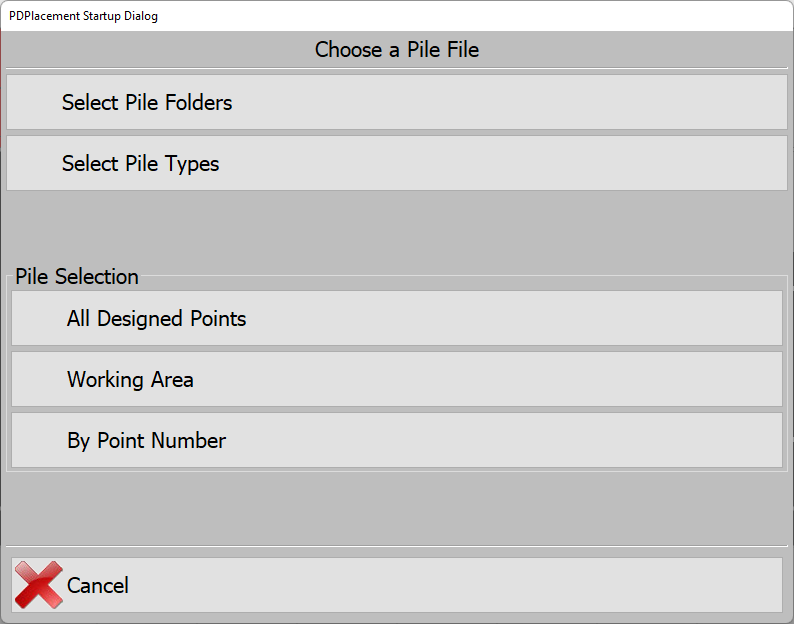
Select Pile Folders
PD Grade stores all designed and as-built piles within a unified system, whether they are created within the software or imported from a .PILE file or other design formats. These piles are organized in a folder structure, allowing for efficient management and sharing.
- Piles can be shared between multiple pile drivers for coordinated operations.
- Integration with Carlson Command enables advanced reporting and pile design modifications.
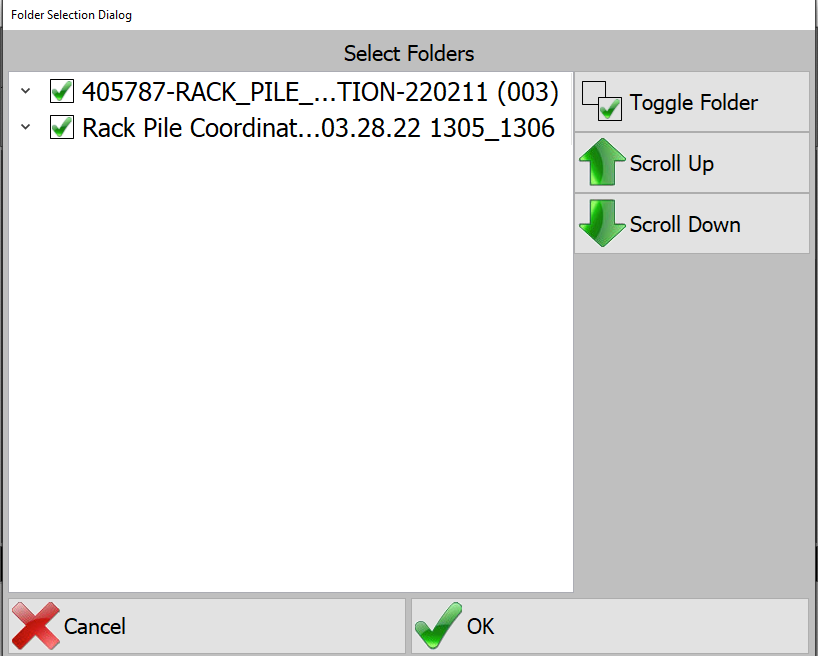
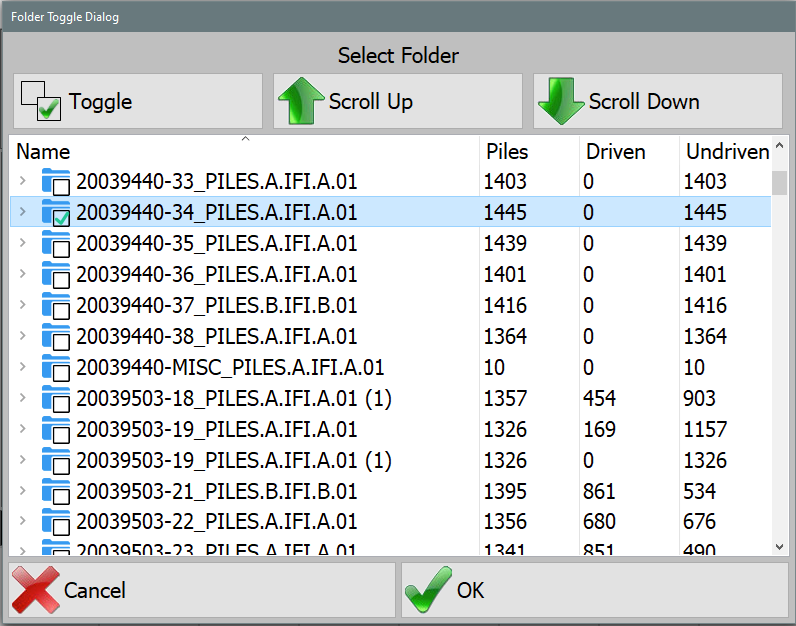
Selecting Pile Groups (Folders)
- To select a group of piles, toggle the checkbox next to the corresponding Folder.
- Selecting a parent Folder will automatically select all child Folders within it.
Select Pile Groups (Folders)
Each Folder in PD Grade provides key details about the pile group, including:
- Total Piles: The total number of piles within the folder.
- Driven Piles: The number of piles that have already been driven.
- Undriven Piles: The number of piles yet to be driven.
Selecting a Folder
- Choose the appropriate folder(s) for the current working session.
- Press OK to confirm the selection.
- Return to the Select Navigation menu
Pile Selection
- All Designed Points: Displays every pile in the Plan View, allowing the operator to navigate freely between piles (the most commonly used setting).
- By Point Number: Allows manual entry of a specific pile number for direct selection.
- Point From List: Opens a list of available piles, enabling the operator to select a specific pile to drive.
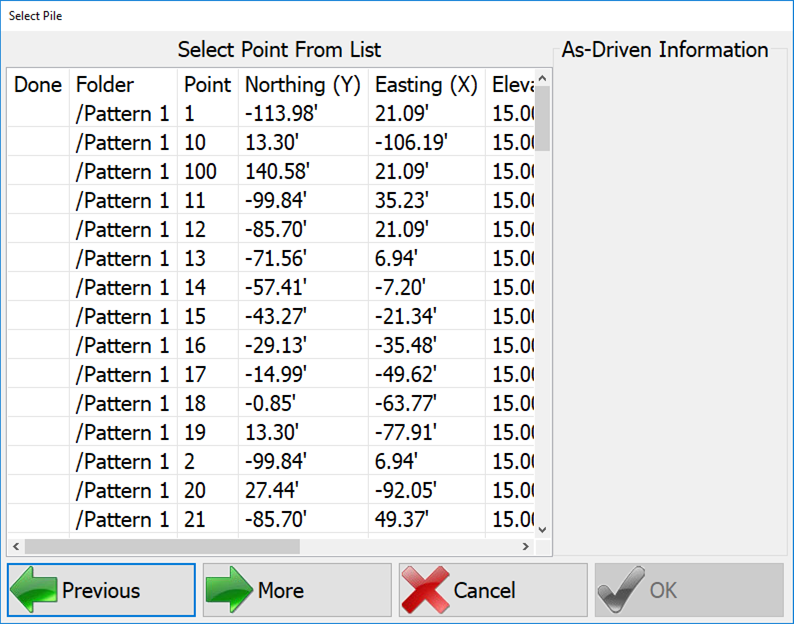
Select Pile from List
Add New Pile
Add a new pile to an existing folder. Select item and press Edit to input a value.
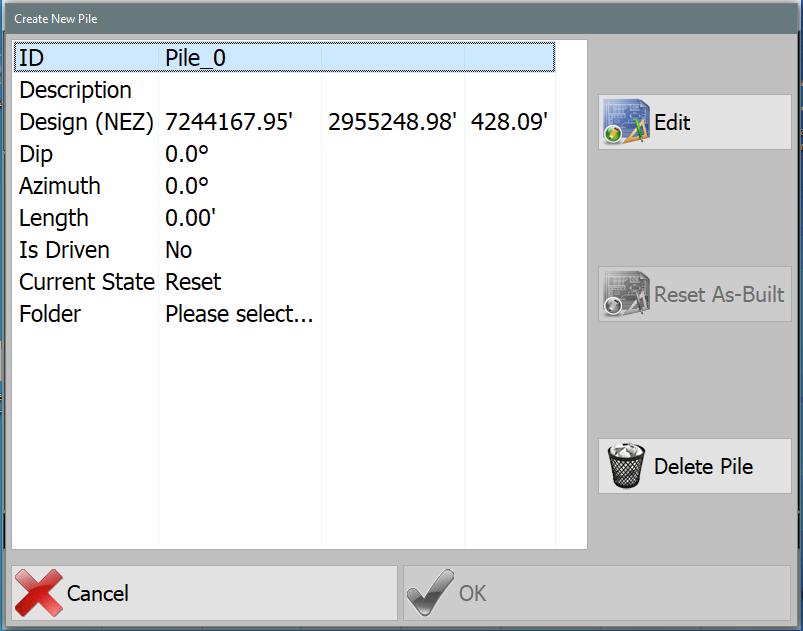
- ID: Identification for the pile. Press Edit to input value.
- Description: Additional description or notes for the pile
- Design: (NEZ) Coordinate of the design for the pile
- Dip: Dip angle
- Azimuth: (degrees) direction of the pile
- Length: Distance to drive the pile
- Is Driven: (not editable) If the is currently driven
- Current State: (not editable)
- Reset
- Placed
- Refused
- Finished
- Surveyed
- Folder: Select a folder for the new pile.
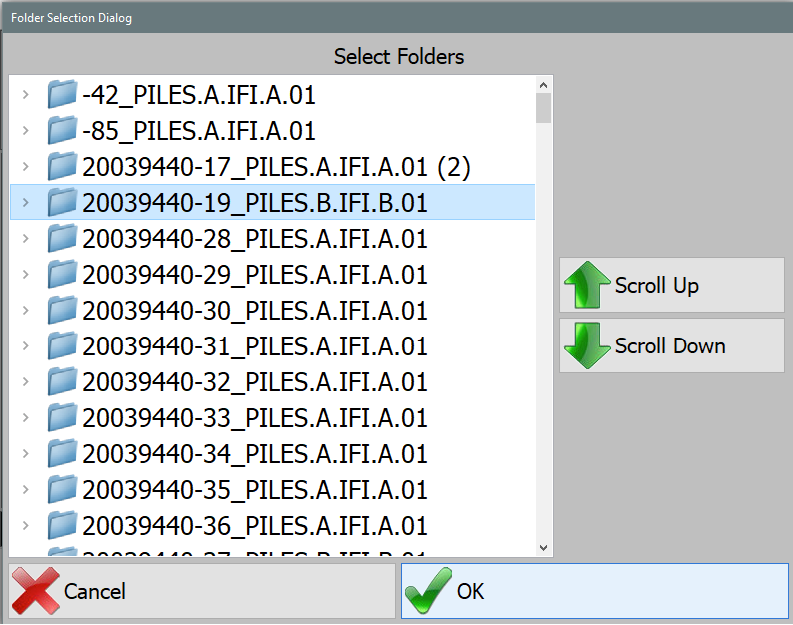
Select Pile Folder
Edit Current Pile
This option is available only if a pile is selected.
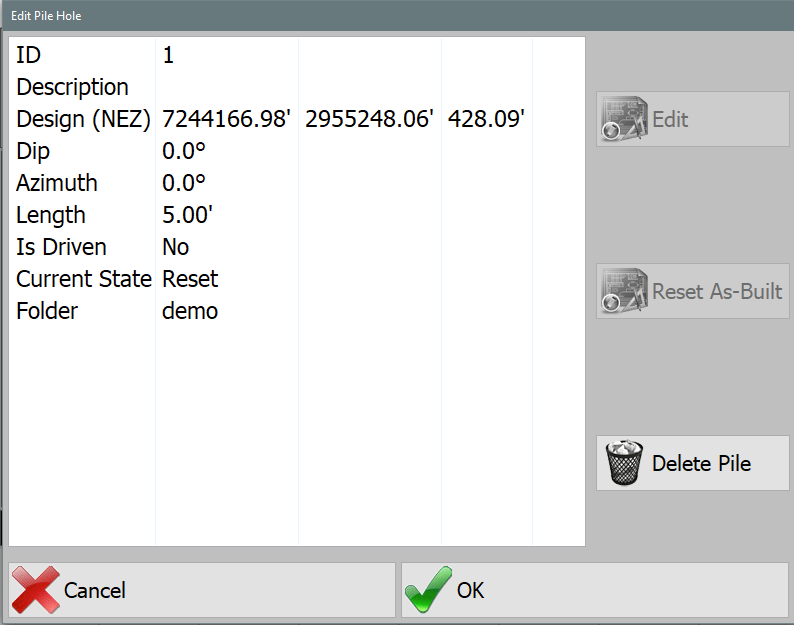
Note: The data options are the same as those specified in the Add New Pile section.
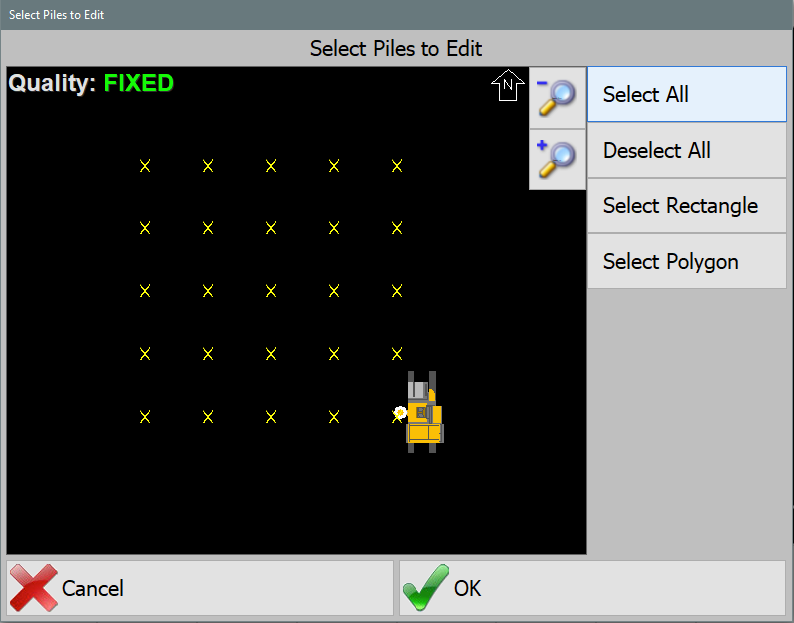
Editing Piles
- Select a group of piles from the currently loaded set to edit.
- Select All: Selects all piles on screen.
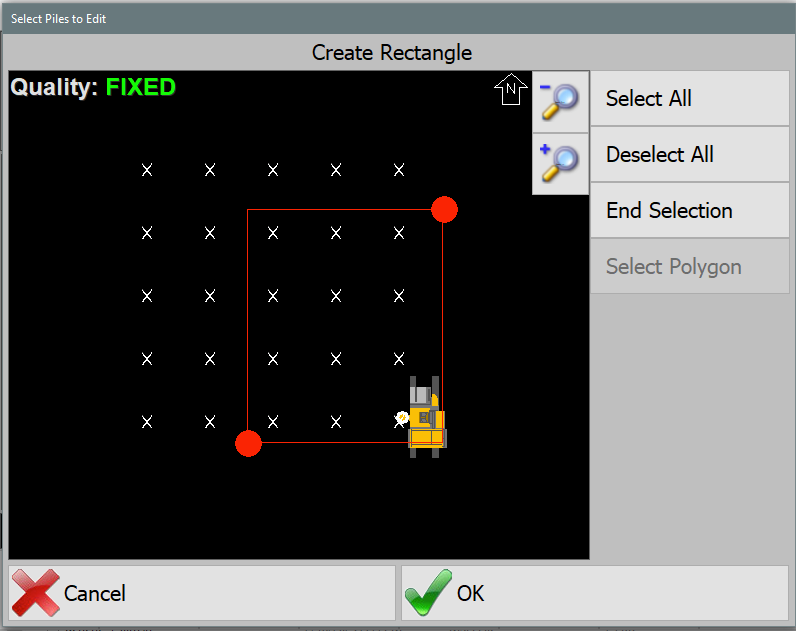
Select All - Select Rectangle: Pick two points on screen to create a selection rectangle. Press End Selection to select the piles. The selected piles are then highlighted in yellow.
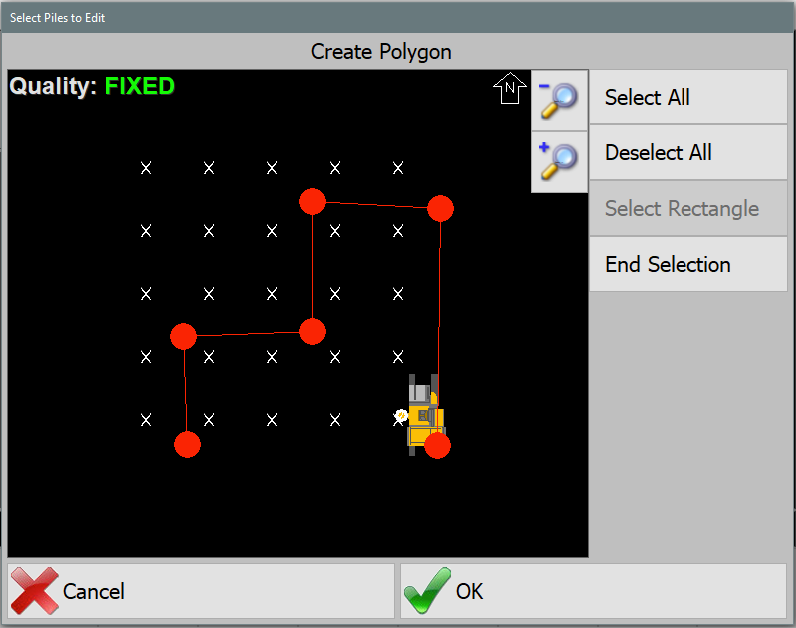
Select Rectangle (Window) - Select Polygon: Pick multiple points on screen to create a selection polygon. Press End Selection to close the polygon and select the piles. The selected piles are then highlighted in yellow.
Select Polygon - Deselect All: Remove all highlighted piles to start over.
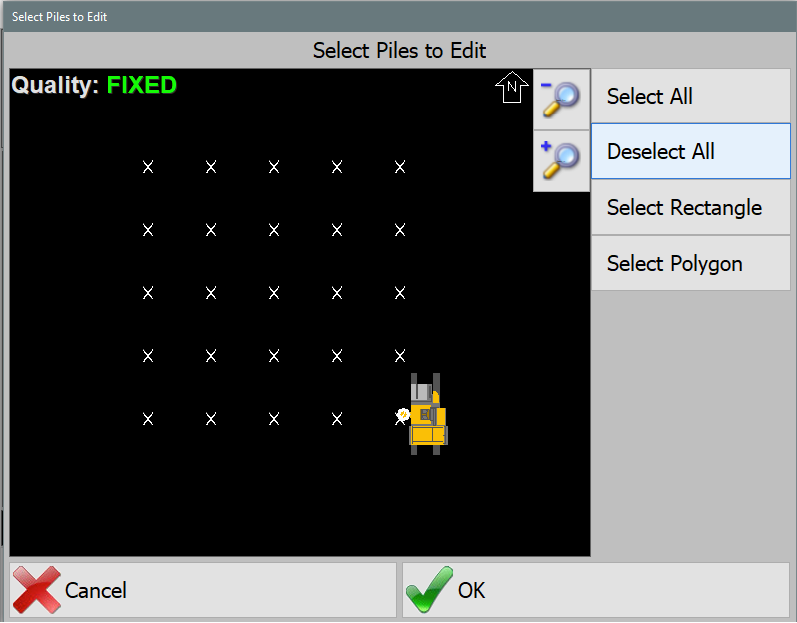
Deselect All (Select None)
- Select All: Selects all piles on screen.
- Press OK to continue.
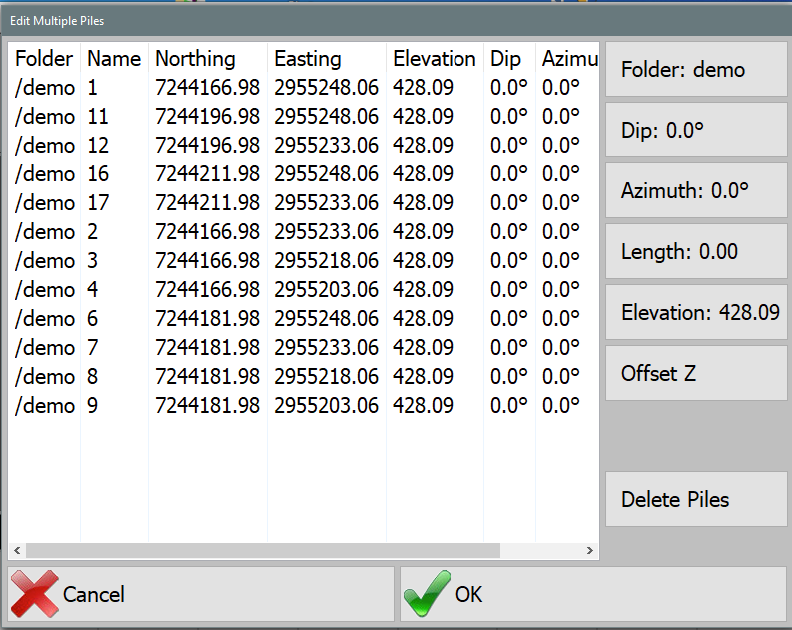
Edit Piles - Press the buttons on the right to change:
- Folder: Move piles to a different folder.
- Dip: the dip angle.
- Azimuth: the direction.
- Length: the drive distance.
- Elevation: the top-of-pile elevation.
- Offset Z: offsets all elevations by the entered amount.
- Delete Piles: deactivate the selected piles.
- Press OK to update the selected piles.
Import File
PD Grade can import pile data from the following formats:
- JPLZ (Carlson-specific format)
- TXT (Text File with Comma-Separated Values)
- CSV (Comma-Separated Values)
CSV File Format
A CSV file contains pile data formatted as comma-separated values, typically including:
- Point Number
- Northing (Y-coordinate)
- Easting (X-coordinate)
- Top of Pile Elevation
- Description
- Type (optional)
- Length (optional)
Note: CSV files can be opened as text files or imported into spreadsheet applications like Microsoft Excel.

Importing: Offline - No Command Connection
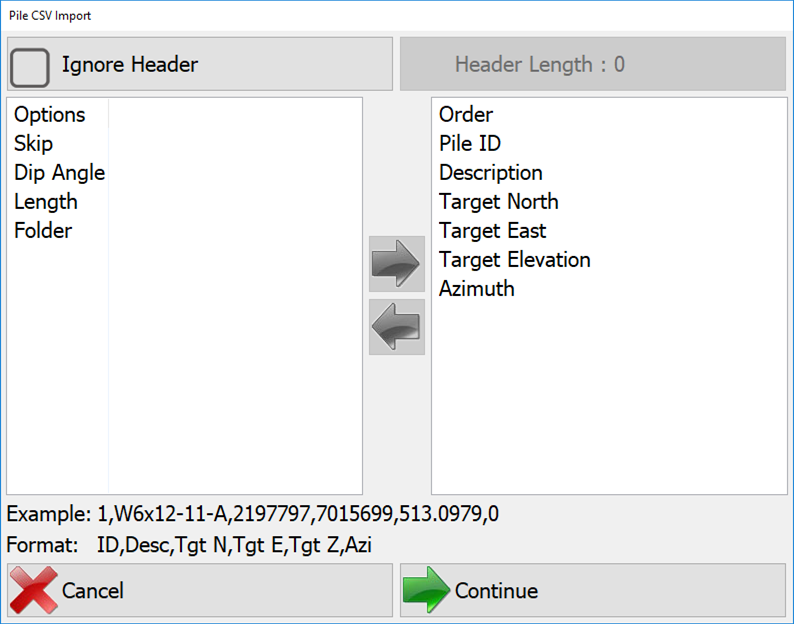
- Define Column Mapping: Assign CSV columns to the corresponding PD Grade data fields.
- Use the Right Arrow to add a column to the Order Column.
- Click on a value in the Order Column and use the Left Arrow to remove it.
- Ignore Headers: Use the Ignore Header option to remove unnecessary lines at the top of the file before import.
- Load the File: Press Continue to proceed with the import. If the folder is missing in the CSV, a prompt will appear with the following options:
- Don't Import: Cancel the import.
- Merge Folder: Update the folder with data from other pile drivers or Carlson Command.
- Overwrite Folder: Replace all existing pile data with the imported file.
- Assign the Folder:
- If no folder is specified, PD Grade will create a new folder based on the file name.
- Optionally, add the imported piles to the current working folders via:
Tools → Select Navigation → Select Pile Folders.
Importing: Online - Command Connection
When connected to Carlson Command, pile patterns and folders automatically sync between Carlson Command and PD Grade. There is no need to export or import any files.
Note: If PD Grade is not connected to the network, manual syncing can be performed using .JPLZ files.
Steps to Import a JPLZ File
- Export from Carlson Command:
- Follow the PD Command User Guide to import new CSV files into Command.
- Open Pile Utilities in Command and select the Export tab.
Pile Utilities 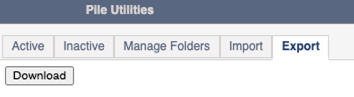
Pile Utilities - Export tab - Click Download to save the (for example) piles.jplz file to your Downloads folder.
- Transfer to PD Grade:
- Copy the piles.jplz file onto a USB drive.
- Insert the USB into the PD Grade control box.
- Import into PD Grade:
- PD Grade will only accept .JPLZ files when connected to a Carlson Command site.
- The .JPLZ file contains the entire database structure and ensures data integrity.
- Select the piles.jplz file to import the new pile folders.
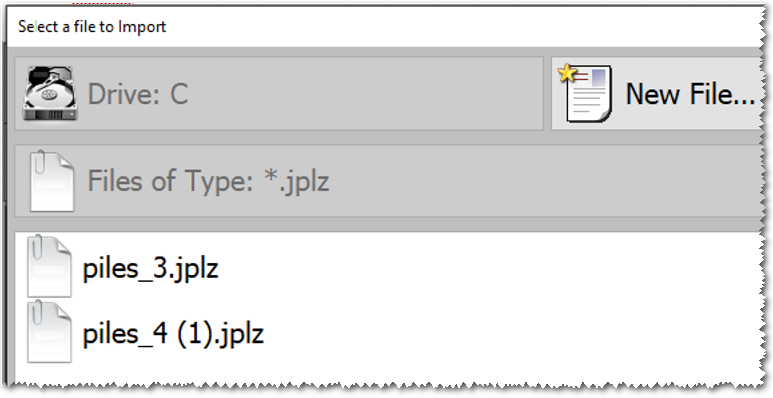
Select *.JPLZ File
Export JPLZ File
The JPLZ file format is used to export the entire pile database, including as-piled data, for transfer between machines or to Carlson Command for further analysis and reporting.
Export Process
- Navigate to Export Settings:
- Go to Tools → Options → System Options → Communication → Streaming Settings → Company
- Ensure the correct site configuration is selected.
- Export the JPLZ File: The export process will generate a JPLZ file containing:
- All designed piles
- As-piled data (recorded pile locations and driving information)
- File Transfer Options:
- Import into Carlson Command: Allows for manual transfer and centralized reporting of as-piled data.
- Import into Another PD Grade Machine: Enables sharing pile designs between machines for coordinated field operations.
Pile Statistics
Statistics on the quantity of daily, session-based, or time-based piles that were placed.

- Two statistical tallies are available to configure for different needs.
- Press Pile Type to cycle between ALL and the loaded pile types.
- Each tally will show the total piles placed and the piles placed of the current type.
- Press Auto Reset to cycle between Daily, Log in, and Time.
Pile Report
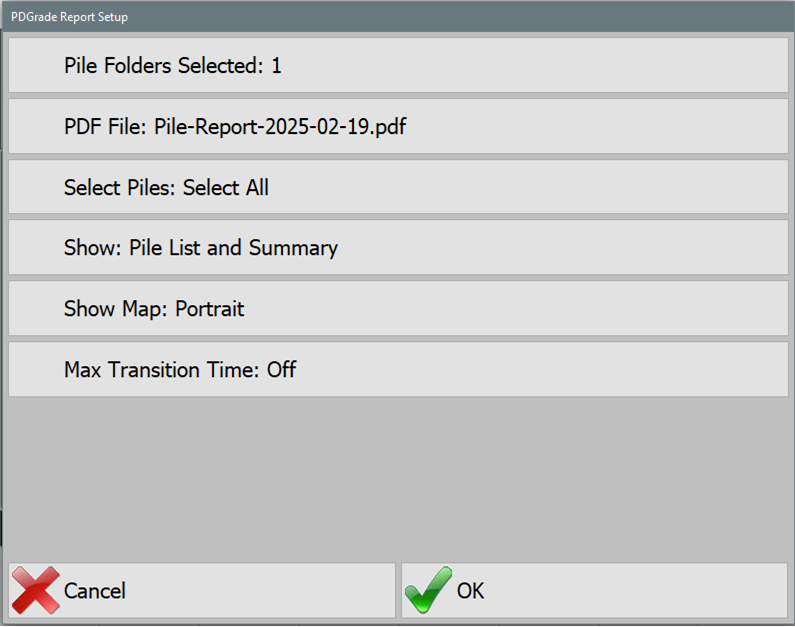
PD Grade allows users to generate detailed reports on pile driving performance, including:
- Penetration rates
- Pile driving times
- Pile placement accuracy (within or out of tolerance)
Report Configuration
- Select Pile Folders: Choose the pile folders to include in the report.
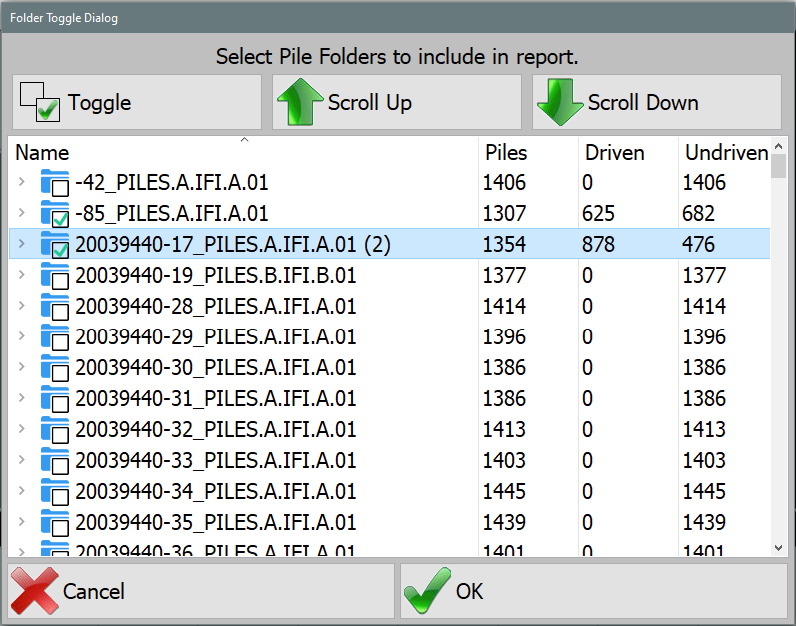
Pile Folders Selected - Set PDF File Name: Define a name for the generated PDF report.
Note:The default format is pile_file_name-date.PDF.
- Select Piles to Include: Choose one of the following selection methods:
- All: Includes all piles.
- From Date Range: Filters piles by date.
- From List: Manually select piles from a list.
- From Map: Select piles based on their location.
- Undriven Piles: Includes only piles that have not been driven.
- Driven Piles: Includes only piles that have been driven.
- Driven Piles Within Tolerance: Filters piles that meet placement accuracy requirements.
- Driven Piles Outside Tolerance: Filters piles that were placed outside the required tolerance.
- Choose Report Display Format:
- Pile List Only: Displays a detailed list of piles.
- Summary Only: Provides an overview without individual pile details.
- List and Summary: Includes both detailed pile data and a summary.
- Show Map Options:
- Portrait: Generates a vertical-oriented map view.
- Landscape: Generates a horizontal-oriented map view.
- None: No map included in the report.
After selecting a map option, set a zoom level for the display.
- Set Maximum Transition Time:
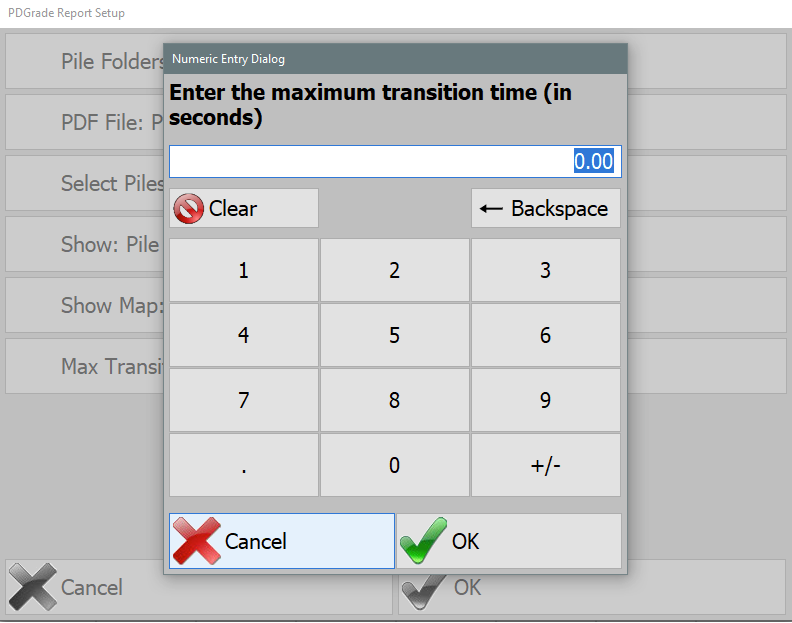
Set Transition Time - Transition time refers to the time taken to move between piles.
- Setting a maximum transition time ensures that non-working periods (e.g. breaks or lunch, etc) are excluded from calculations. For example:
- If set to 30 minutes, lunch breaks will not count toward transition time.
- If set to 5 minutes, pauses shorter than 5 minutes will be included in the average transition time.
Saving Reports
All reports are stored in:
[Install Drive]/Data/reports
Manage Folders
Toggle folders on and off to effectively "Delete" them. This will hide the folder in the Select Folders menu and deactivate it in Command.