Manual Workflow
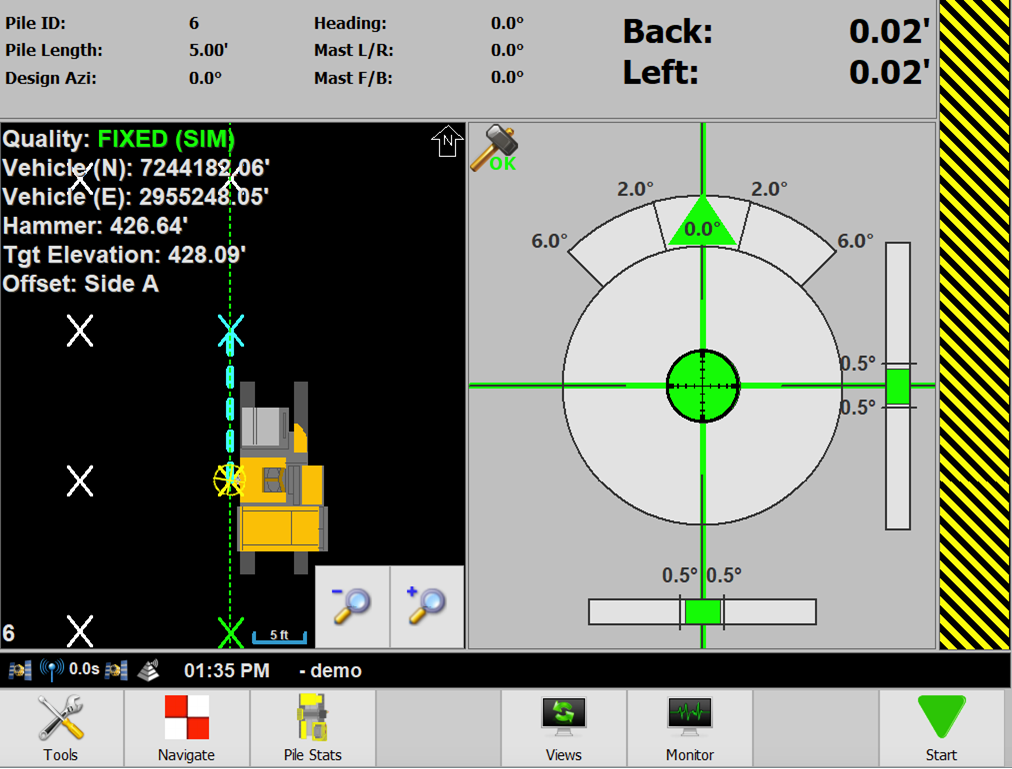
- The operator must track the pile driver to a tolerance of approximately a foot (.3m) forward or backwards and three inches (.1m) left or right with the hydraulics in the middle; allowing for movement in any direction without tracking the vehicle.
- Adjust the tracks so that the azimuth of the machine is equal to the designed azimuth.
- Press the auto-plumb button on the machine (if applicable) so that the mast is auto-plumbed.
- The operator may have to track the pile driver back within tolerance because the mast may have moved outside of the tolerance zone when being set to plumb.
- Check the plumb one more time if the tracks were moved.
- Move the mast until it is directly over the pile (look at the navigation bubble on the top right as well as the Northing/Easting or Forward/Backwards/Left/Right offsets next to the bubble. If using a Vermeer PD25 with PD Controls, this can be done automatically.
- Press Start (if using PD Controls (PD25), this will also be done automatically).
- Begin hammering. A tape measure is displayed on the right and a Distance to Target value is given.
- Press Finish after the correct depth is reached (if using PD Controls (PD25), the hammer will automatically stop hammering at the correct depth).
- Move to the next pile.
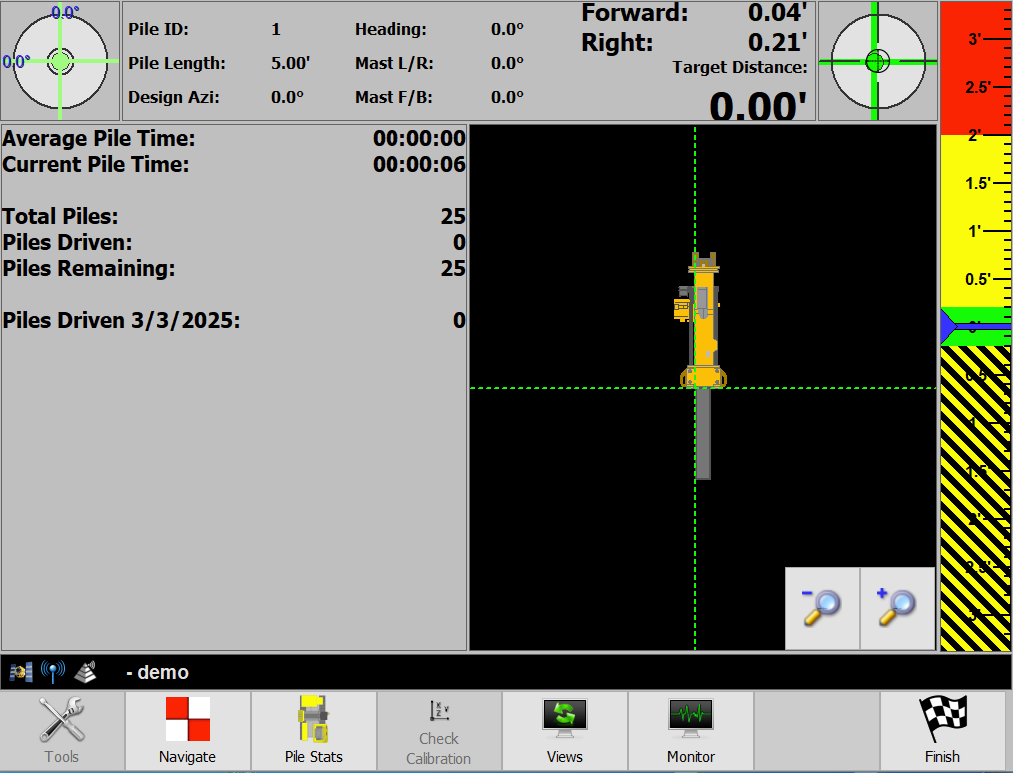
PD Grade also shows the start time, stop time, and elapsed time for each pile and calculates the average pile time.
Point to Point Workflow
Point to Point Option
- PD Grade will navigate the rows north and south unless an azimuth is specified in the .csv pile import in Command.
Note: Reference Guide to importing CSV files as pile files in Command
- When enabled the user is forced to select the starting pile on startup by picking the pile on screen.
- When disabled, the auto selected current pile is the closest pile to the machine.
- When enabled, the next pile selection will always be the next pile in the row.
- Row to Row Option: When enabled and no more piles are in the row, the next pile is the end pile of the next row. If disabled, the next pile is the closest pile to the current row.
Optional Items
- Tools → Pile Display Settings
- Show Next Pile in Plan: If enabled next pile will be marked as blue.
- Show Next Pile Direction in Plan: If enabled, the direction to the next pile will be shown as a dashed blue line.